Wooden planter boxes are the perfect mix of beautiful and practical. Build your own DIY planter box using the instructions below and use it to grow your favorite flowers or herbs.
MATERIALS
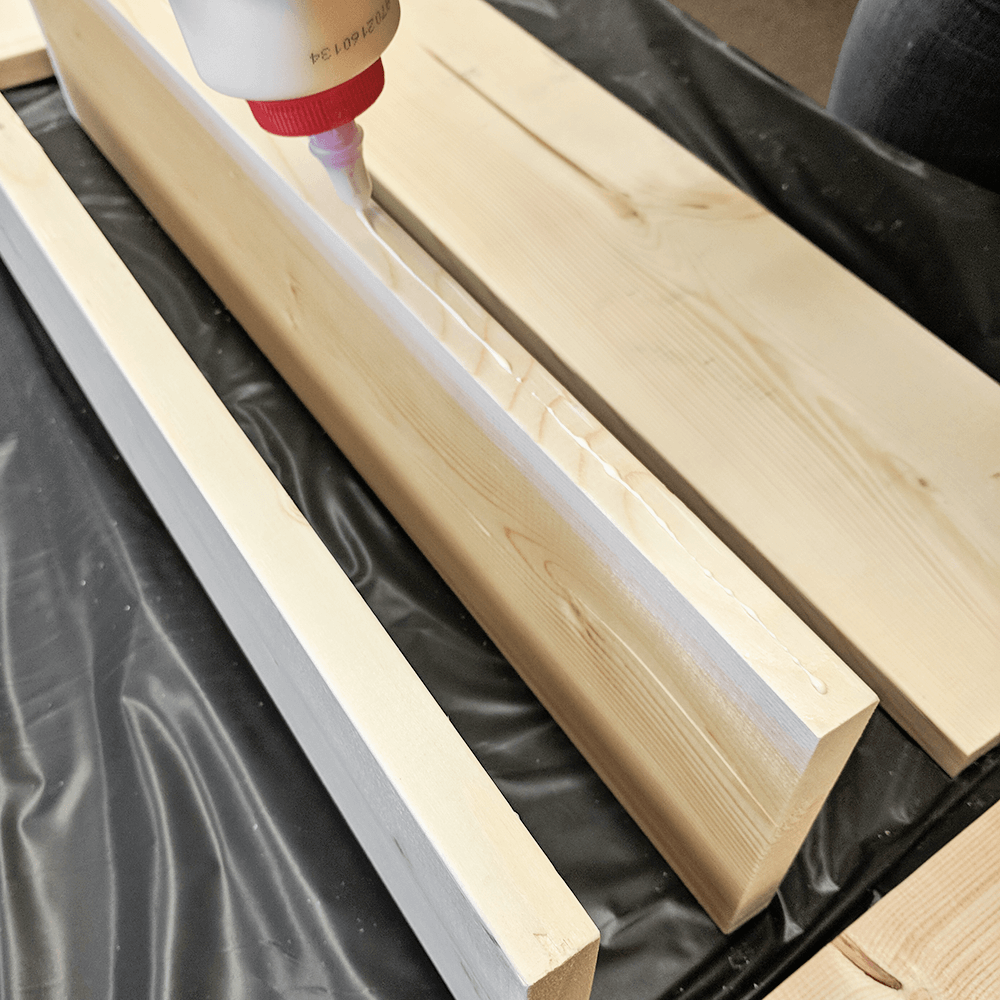
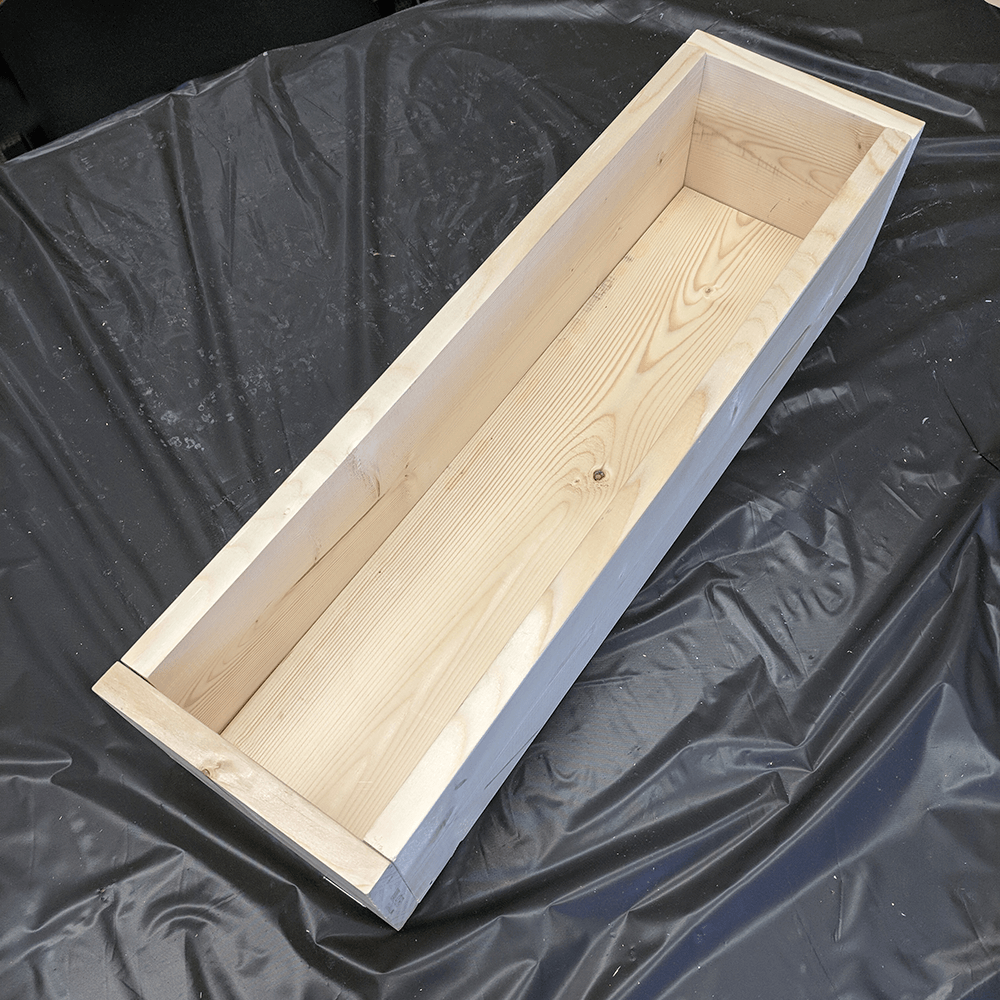
- 1″ spruce or pallet wood cut to 6×22″ (3)
- 1″ spruce or pallet wood cut to 6×7″ (2)
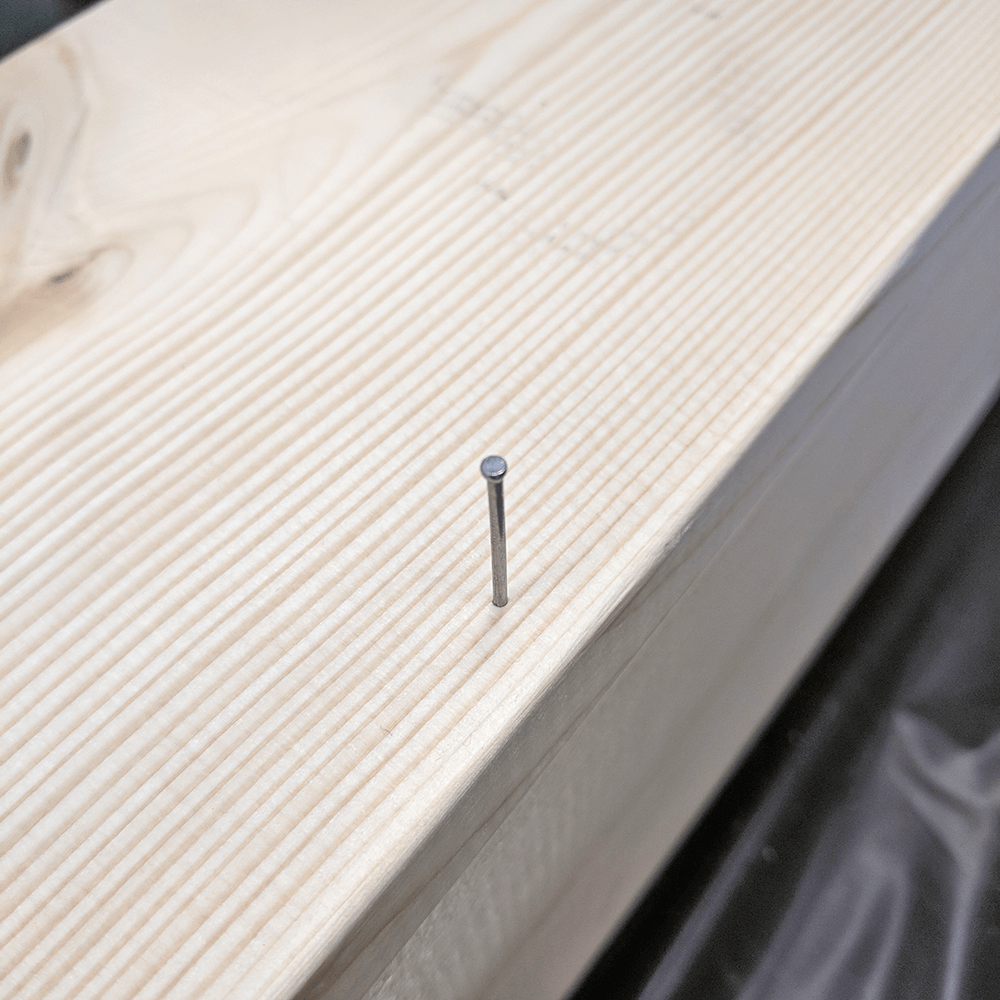
- 1-1/4″ nails & hammer, or a brad nail gun
- Wood glue
- Water-based stain tinted in your desired color (we used Minwax water-based stain in Onyx)
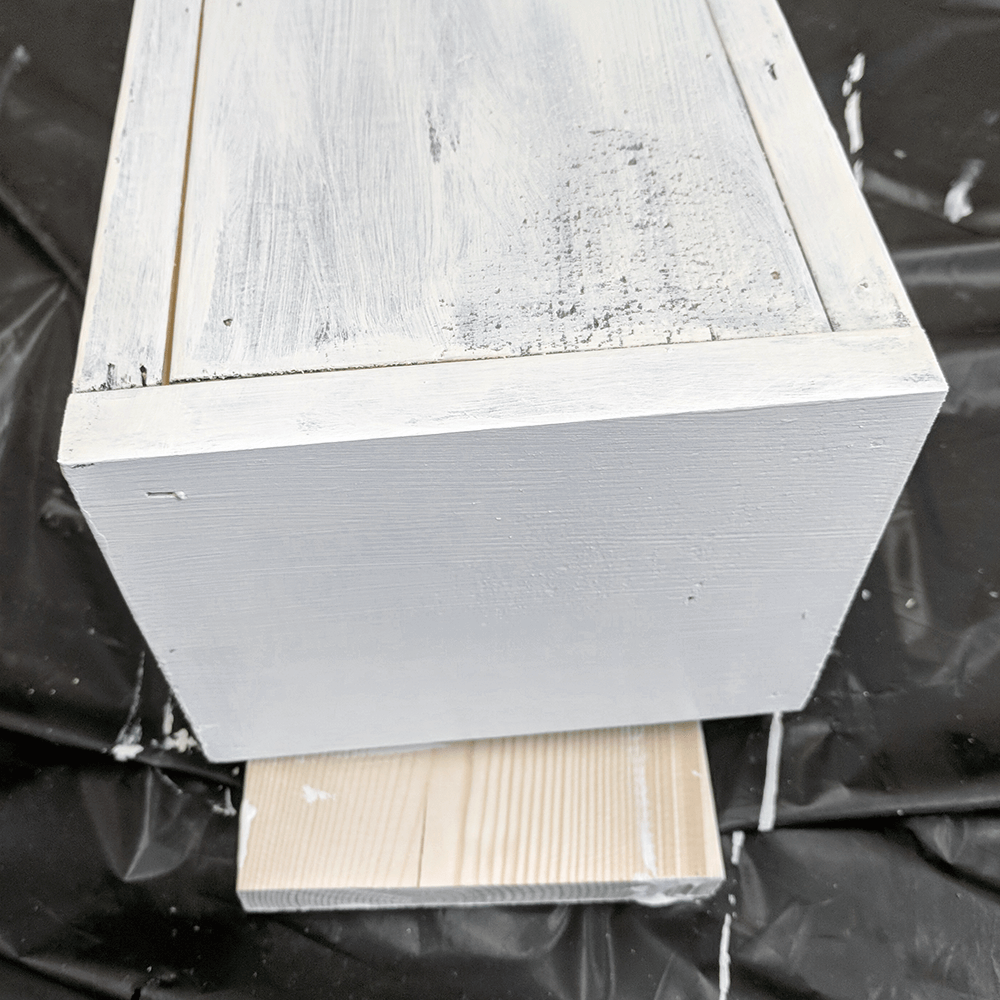
- Chalk paint in your desired color (we used Country Chic All-In-One Decor Paint in Cheesecake)
- Pulls/Handles
- Paintbrushes
- Screwdriver
- Cotton rags
- Water
- Sandpaper
- Disposable gloves (optional)
DIRECTIONS
- Lightly sand the edges of your wood pieces to smooth out any splinters from the cuts.
- Assemble the pieces into a box by gluing the edges and nailing the boards together with 1-1/4″ nails. A brad nail gun makes the assembly easier, but you can also use your good ol’ trusted hammer too.
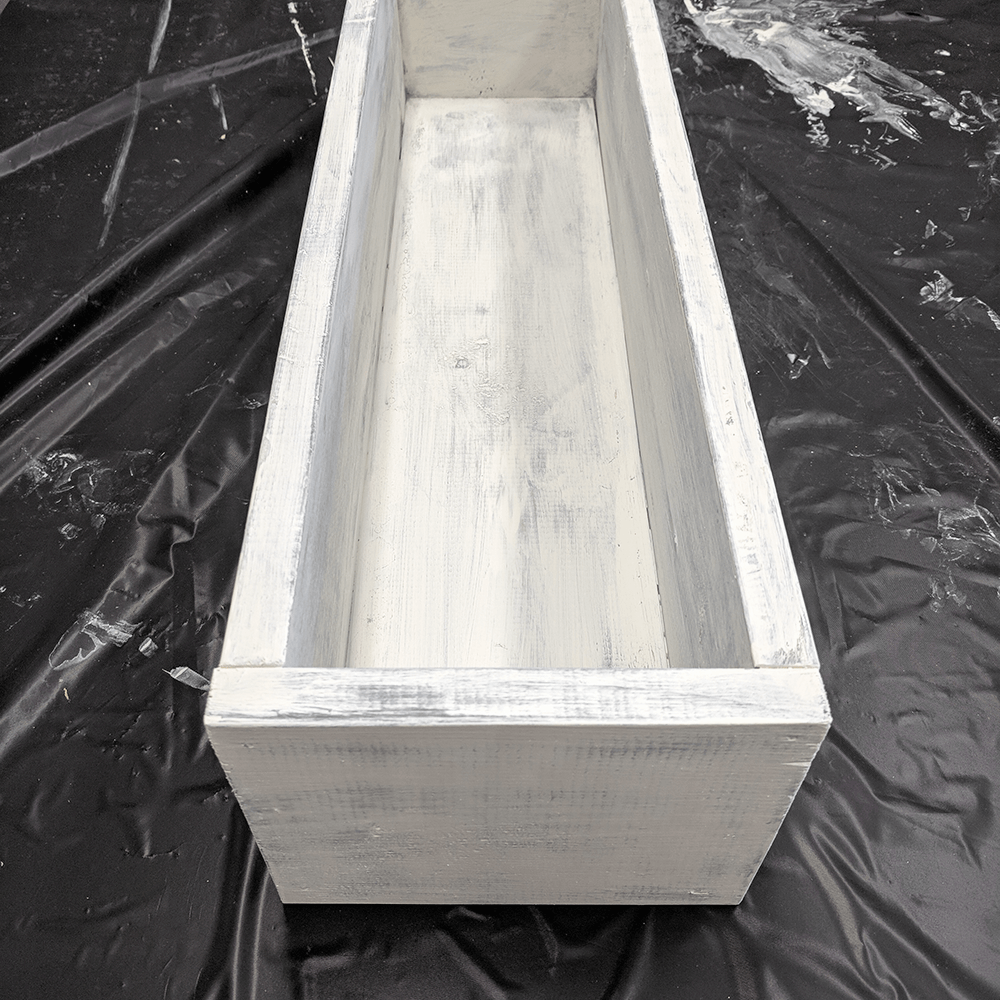
- Apply the water-based stain to all sides your box – front, back, top, bottom and inside – using a “wipe on, wipe off” technique: a) start with a small section and apply the stain in a light layer moving the brush in the direction of the grain; b) use a clean rag to wipe off the excess stain, wiping in the direction of the grain. Don’t worry about the stain looking too “perfect” – you’re going to cover it with chalk paint afterward.
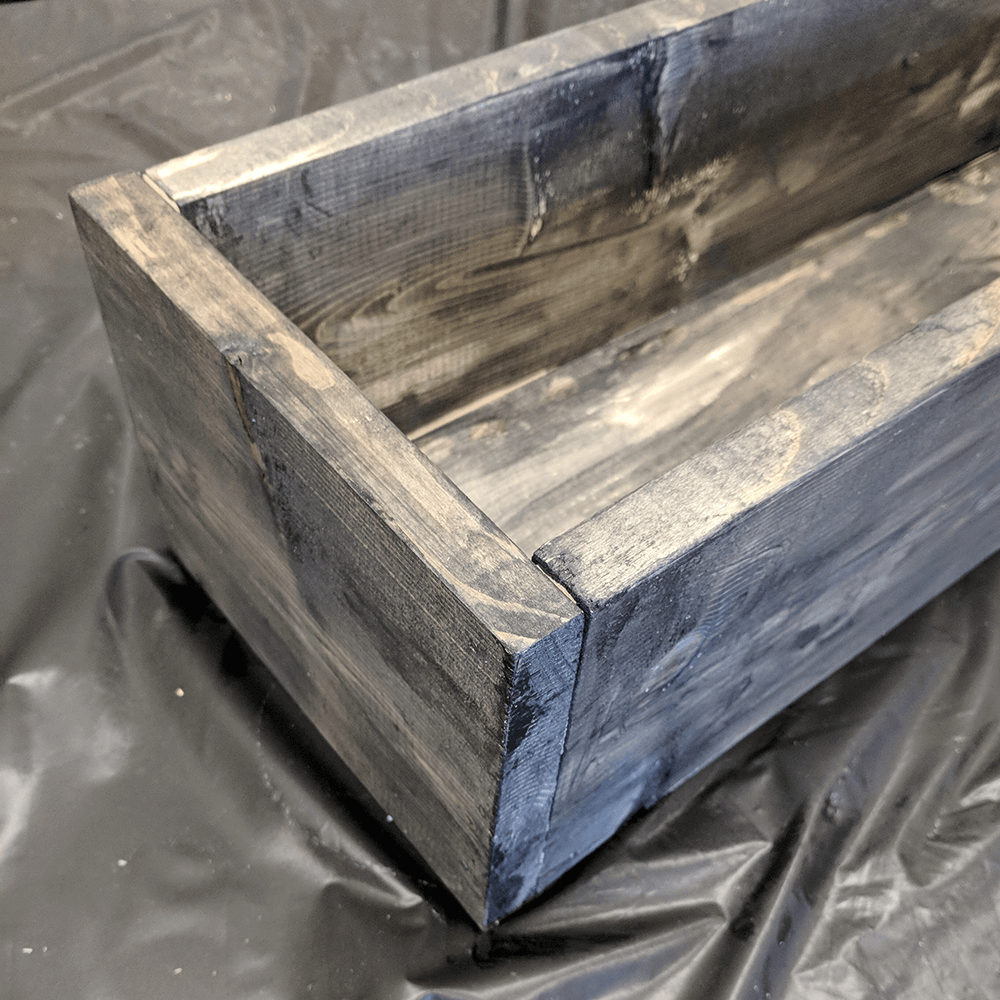
- Set your box aside to dry for 5-25 minutes. You want your box to be dry to the touch before moving on to the chalk paint.
- Once your box is dry, apply the chalk paint with a paint brush. Again, your brush strokes should follow the direction of the grain. To get a smooth finish, you want your paint strokes all in one direction. If you paint crosswise, you might end up with texture when your paint dries. You also do not want to paint over sections that have started to dry already; you will end up removing the first layer of paint and you will not end with a smooth finish.
- Paint coverage is completely up to you and the look you want to achieve. A box that shows more ivory with less distressing will require more paint, whereas a more grey or “weathered” look will need less chalk paint. Just remember, the more paint you put on, the more you may have to take off when it comes to the “antiquing” process.
- Set your box aside for 5-10 minutes and wait for the chalk paint to partially dry. It is important that the chalk paint is dry to the touch before you start antiquing!
- When the chalk paint is dry to the touch, take a damp cloth and start rubbing away the chalk paint. You will start to see the brown stain show through. The harder you rub and the more water you use, the more chalk paint you will remove. Focus on areas of the box where natural wear and tear would occur such as edges, corners, or knots. Rinse your cloth when it becomes full of paint and repeat the process until you are happy with the look. You can remove as much or as little chalk paint as you want to get the antiquing effect you like.
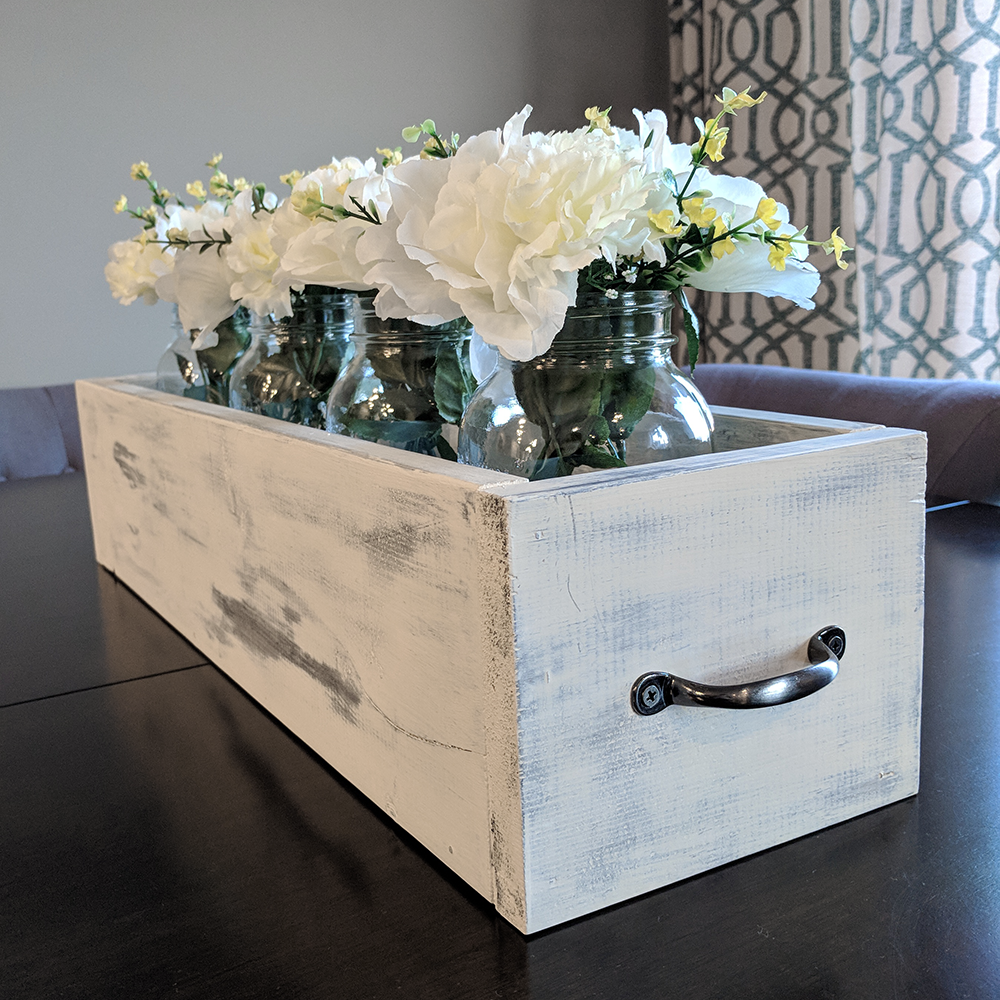
- When you are happy with your look, let your planter box sit until it is completely dry.
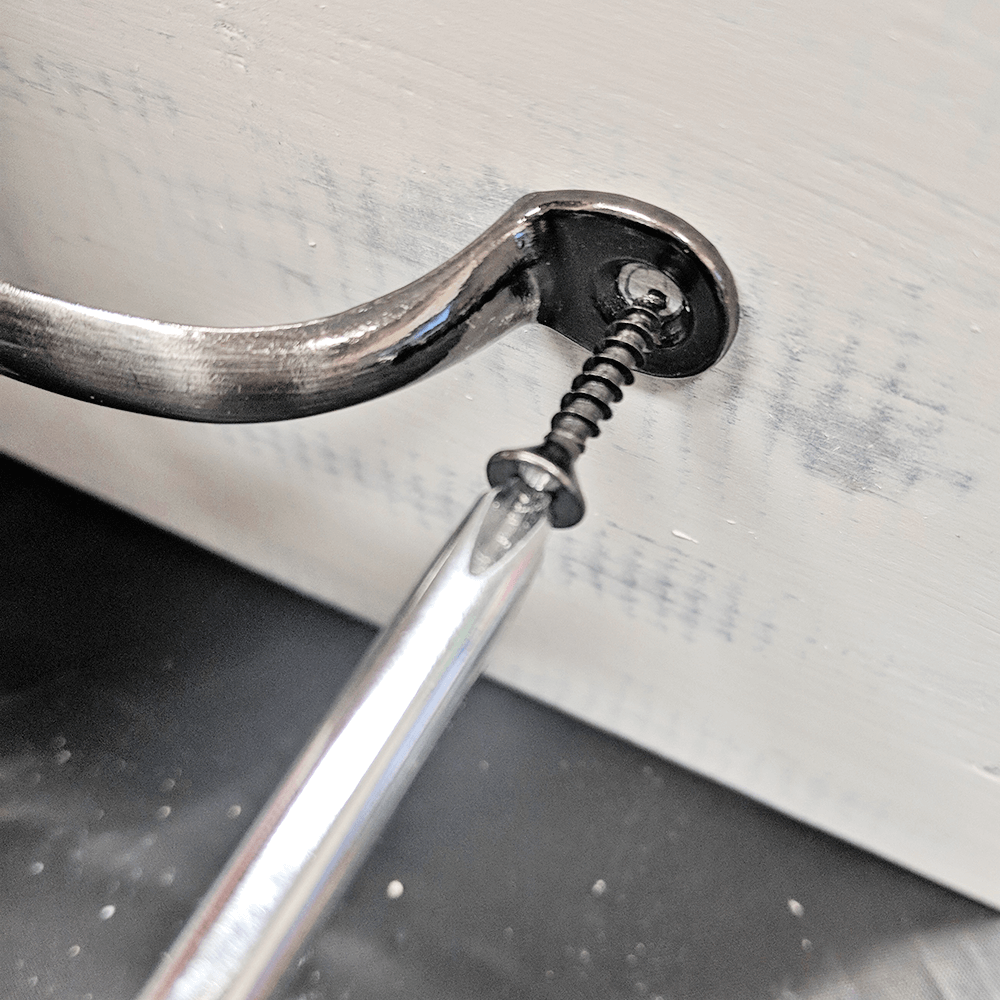
- Place your handles on either side of your planter box and secure them with screws.
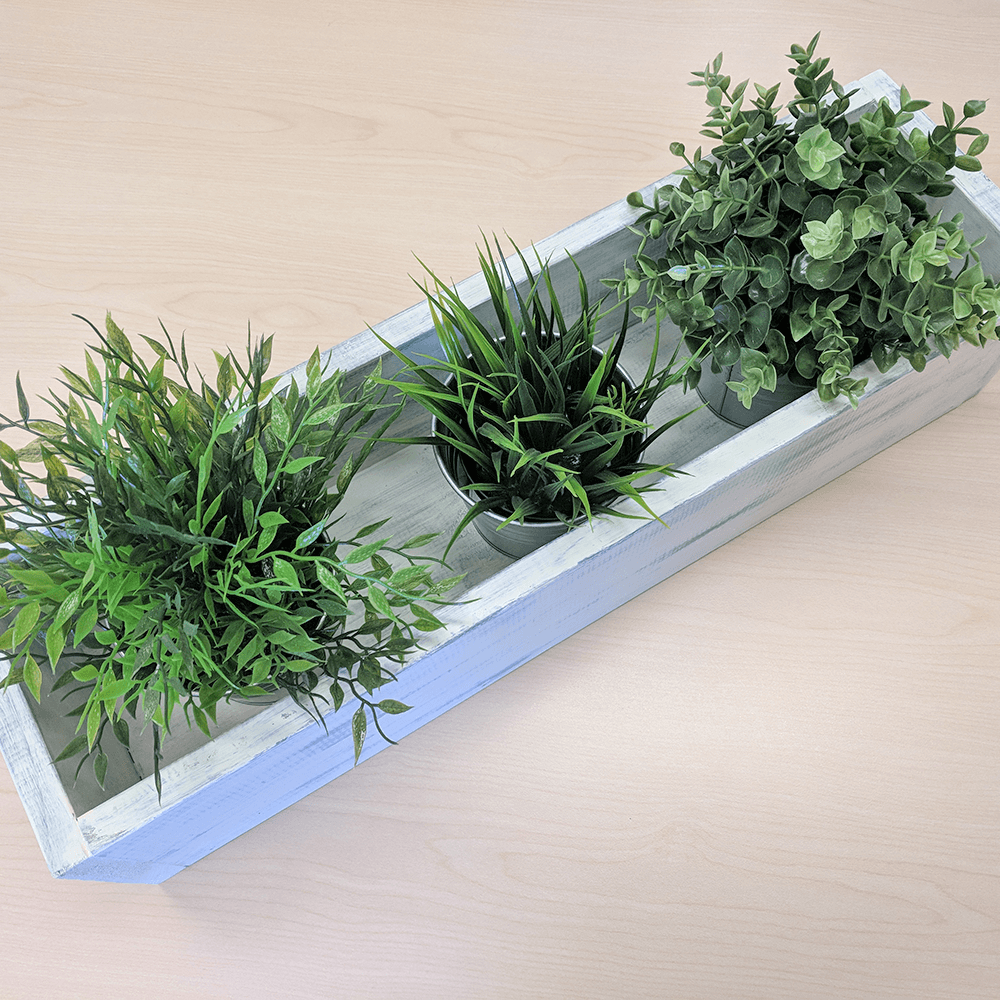
- Now you’re ready to decorate your planter box with greenery, lights, flowers, candles, mason jars, or herbs – the possibilities are endless!