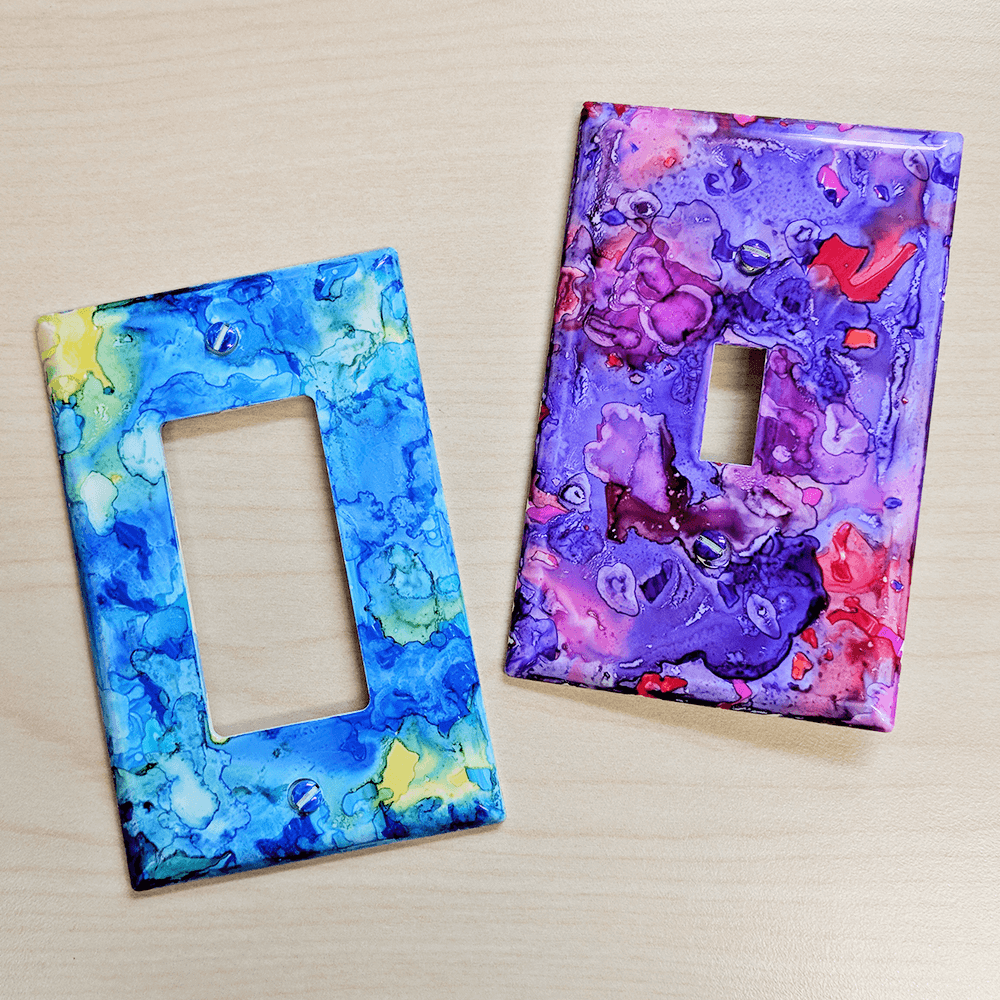
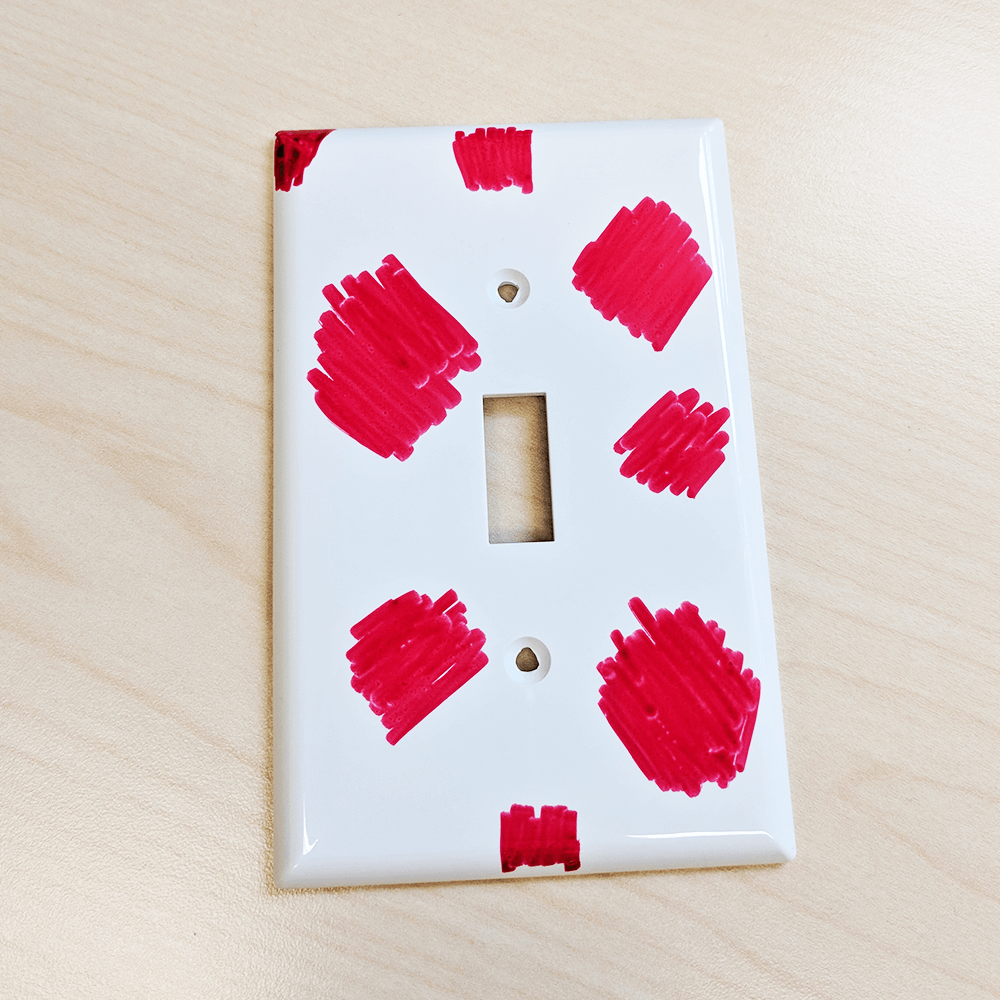
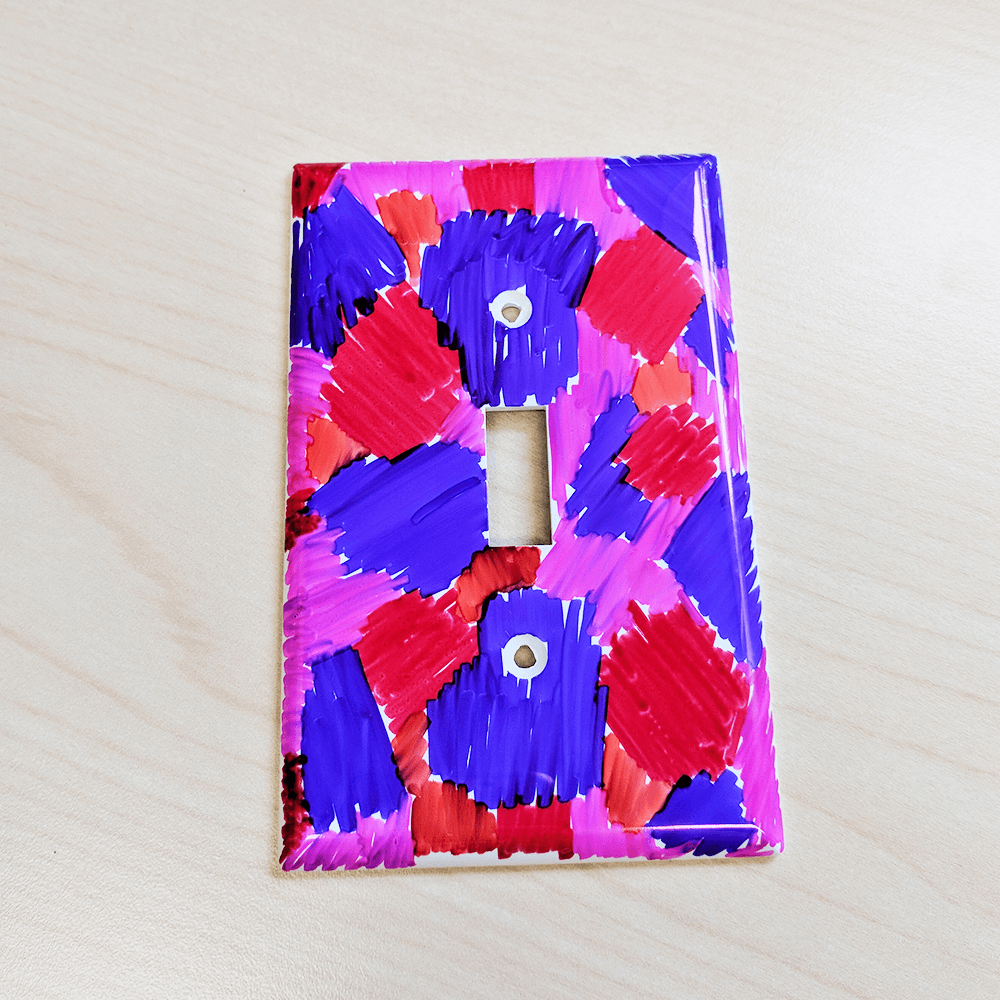
Add color to your light switch with this DIY watercolor technique.
Materials
- permanent markers
- plastic light switch cover
- rubbing alcohol
- straw
- screwdriver
Directions
- Using permanent markers, color the entire front of the light switch cover with your favorite colors.
- Dip your straw into the rubbing alcohol. Suction the rubbing alcohol by covering the top of the straw with your pointer finger. Let small amounts of rubbing alcohol drip over the permanent marker by releasing your finger from the top of the straw. The more rubbing alcohol you use, the more diluted the colors will be. The less rubbing alcohol you use, the more vibrant the colors will be.
- Let the colors mix together. You can also use your straw to move around the rubbing alcohol and blend the colors.
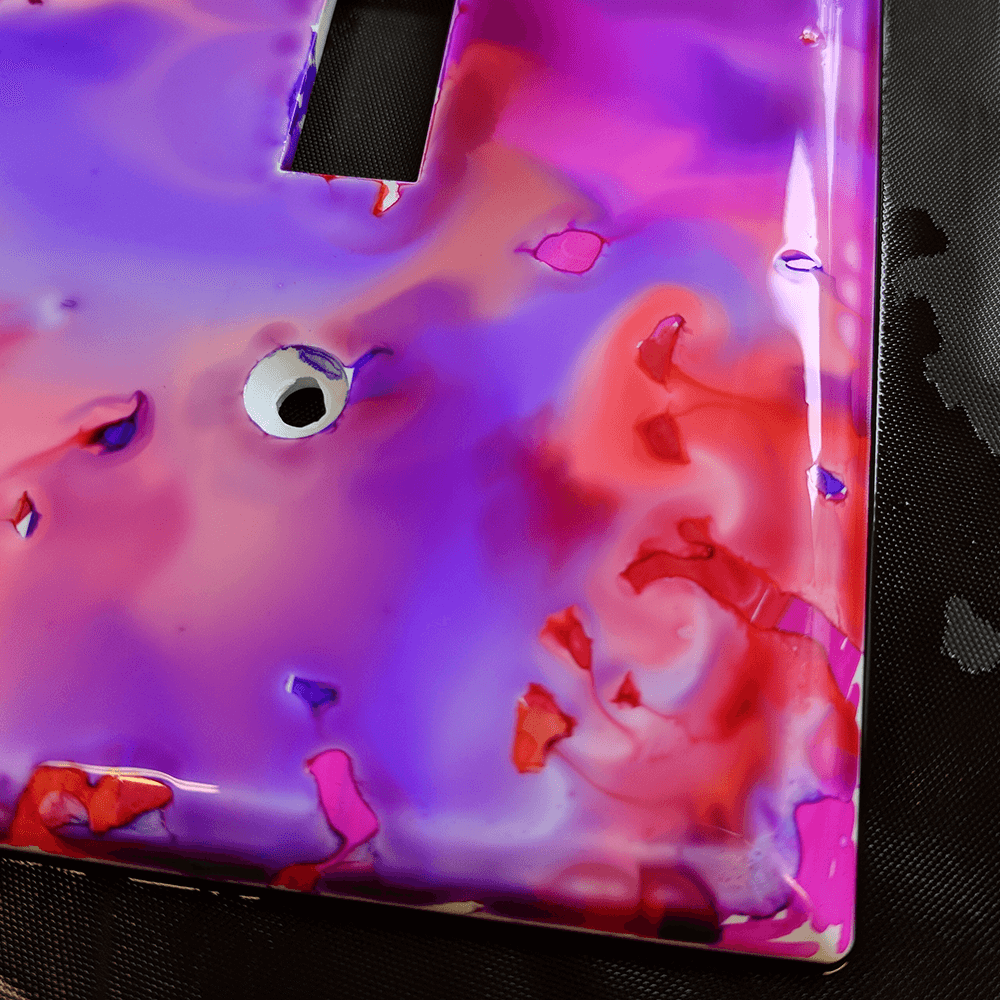
- Let the rubbing alcohol dry for 15-30 minutes until dry to the touch. If the rubbing alcohol took away too much of the color, you can repeat steps 1-3 once the surface is dry: color over that spot with permanent marker, apply a small amount of rubbing alcohol to that specific area and blend in the colors.
- Once your light switch cover is completely dry, you can install it over your light switch using a screwdriver and two screws.
